 扫码关注
扫码关注


我们知道HFSS是一款电磁仿真商用软件,用其进行天线的设计十分方便。而该软件也预留了可以运行脚本的接口,使用者可以使用脚本对软件进行控制,实现模型的建立、求解等等。由于后期可能会用到联合仿真,而大多数联合仿真的脚本都是使用的Matlab进行编程,网上也有不少现成的api,因为对python比较熟悉,且python除了数值计算其他的功能也相当强大,并且免费开源,于是决定用python写一个建模的脚本(其实是我matlab学得太烂了),折腾了两天,终于把微带天线的模型建立与仿真的过程搞定了,当然是基于有Matthew Radway这位大牛的基础上。这个例子也是接触HFSS时手绘天线做的第一个例子,现在用代码做一遍,也是很有意思的事情。下面分享给大家。
1、连接软件
GetAppDesktop
Use: GetAppDesktopis a function of oAnsoftApp. This function does not take an input and it returns an object. The object is assigned to the variable oDesktop.
Syntax: GetAppDesktop()
Return Value: Object.
Parameters: None
Example:
Set oDesktop = oAnsoftApp.GetAppDesktop()
给出了函数名,参数值,返回值,以及一个实例(这个帮助文档写得很不错,但是后面阅读过程中也发现了一些小错误,当然很可能是因为我用的是daoban)。这个返回值oAnsoftApp就是后面进行一系列操作要使用的对象,所有的操作的形式都是下面这样:oAnsoftApp.
python中编写了一个接口函数把这个函数封装在里面。代码如下:
from __future__ import division, print_function, unicode_literals, absolute_import
import win32com.client
def setup_interface():
"""
Set up the COM interface to the running HFSS process.
Returns
-------
oAnsoftApp : pywin32 COMObject
Handle to the HFSS application interface
oDesktop : pywin32 COMObject
Handle to the HFSS desktop interface
Examples
--------
>>> import Hyphasis as hfss
>>> [oAnsoftApp, oDesktop] = hfss.setup_interface()
"""
# I'm still looking for a better way to do this. This attaches to an
# existing HFSS process instead of creating a new one. I would highly
# prefer that a new process is created. Apparently
# win32com.client.DispatchEx() doesn't work here either.
oAnsoftApp = win32com.client.Dispatch('AnsoftHfss.HfssScriptInterface')
oDesktop = oAnsoftApp.GetAppDesktop()
return [oAnsoftApp, oDesktop]
作者用了win32com.client.Dispatch()这个函数,这个函数是专门用来连接接口的,返回值中的那个oDesktop就是生成的对象。
实际调用代码:[oAnsoftApp, oDesktop] = hfss.setup_interface()
2、新建一个project
oProject = hfss.new_project(oDesktop)
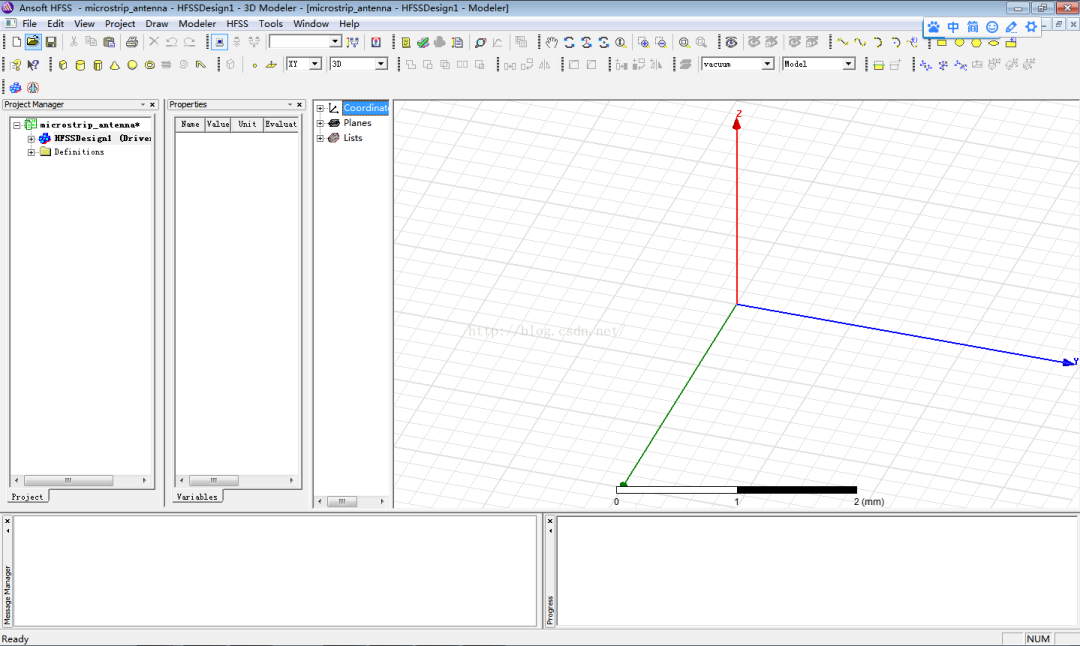
这里就是用了上面生成的oDesktop对象新建了一个object,具体查阅help文档和编写api的工作和上一步一致,并且平时使用时直接使用接口调用即可。注意,下面进行的操作都在这个project中,所以下面操作的对象就是oProject了。这个时候HFSS里应该长这样了。

3、保存project
养成良好习惯,新建的文件之后先保存,在编写过程中因为没有先保存,生成了一堆临时文件,挺讨厌的。这个传人的参数可以包含路径。
hfss.save_as_project(oDesktop,"E:/dj/test/microstrip_antenna.hfss")
4、新建一个design
这里传人的参数为design的名字,设计模式。
oDesign = hfss.insert_design(oProject, "HFSSDesign1", "DrivenModal")
新建完成后发现和我们手动操作是一样的。
5、建立模型
教程中首先新建了一个地板,并设置为PEC。这里也分别调用了这两个函数,尺寸可以用字符串输入,很方便灵活,不需要自己转换为一堆小数点的数字。设置PEC表面首先需要获得平面的faceid,再给这个表面设置边界条件。
raw_input('Press "Enter" to draw a ground plane>')
ground = hfss.create_rectangle(
oEditor,
"-45mm",
"-45mm",
0,
"90mm",
"90mm",
Name='ground',
Transparency=0.8)
raw_input('Press "Enter" to assign a PerfectE boundary condition on the ground.>')
ground_faceid=[]
ground_faceidnum = hfss.get_face_by_position(oEditor, ground, 0, 0, 0)
print ground_faceidnum
ground_faceid.append(ground_faceidnum)
hfss.assign_perfect_e(oDesign, "ground", ground_faceid)
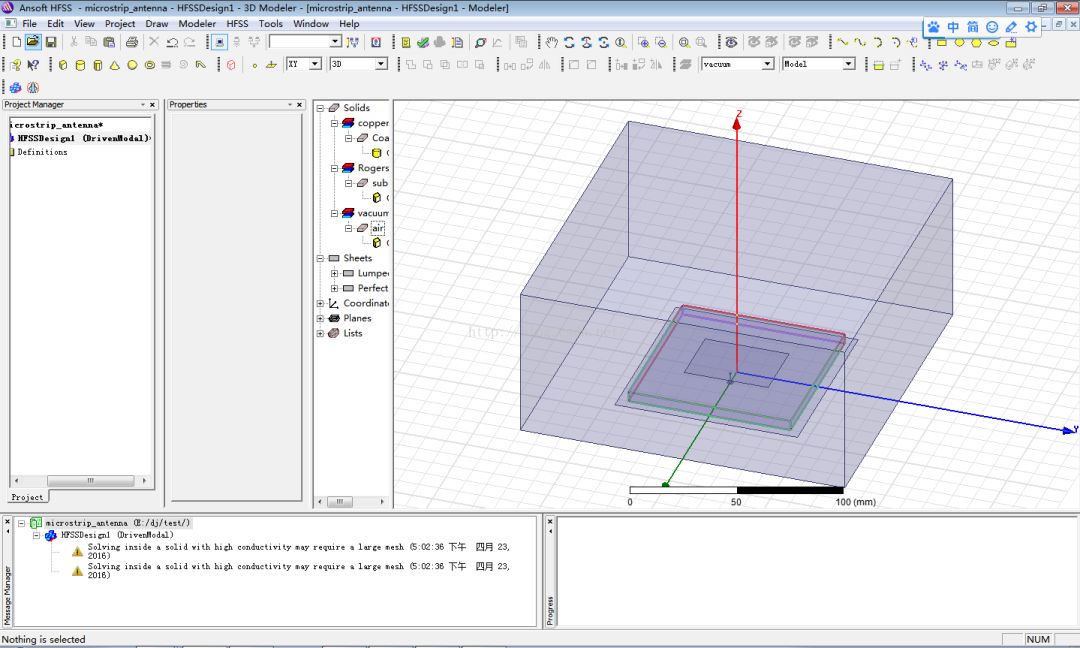
由于建模过程比较类似,这里就不逐个给出了,模型建立完毕如下图(包括了设置边界条件和设置端口):
6、设置求解和扫频
这里求解函数传人了中心频点;扫频传入了扫频方式,起始频率和终止频率,频率间隔。
raw_input('Press "Enter" to insert analysis setup.>')
setuplist=[]
setupname = hfss.insert_analysis_setup(oDesign, 2.45)
setuplist.append(setupname)
raw_input('Press "Enter" to insert frequency sweep.>')
hfss.insert_frequency_sweep(oDesign,
setupname,
"Sweep1",
1.5,
3.5,
0.1,
IsEnabled=True,
SetupType="LinearStep",
Type="Discrete",
SaveFields=True,
ExtrapToDC=False)
7、求解
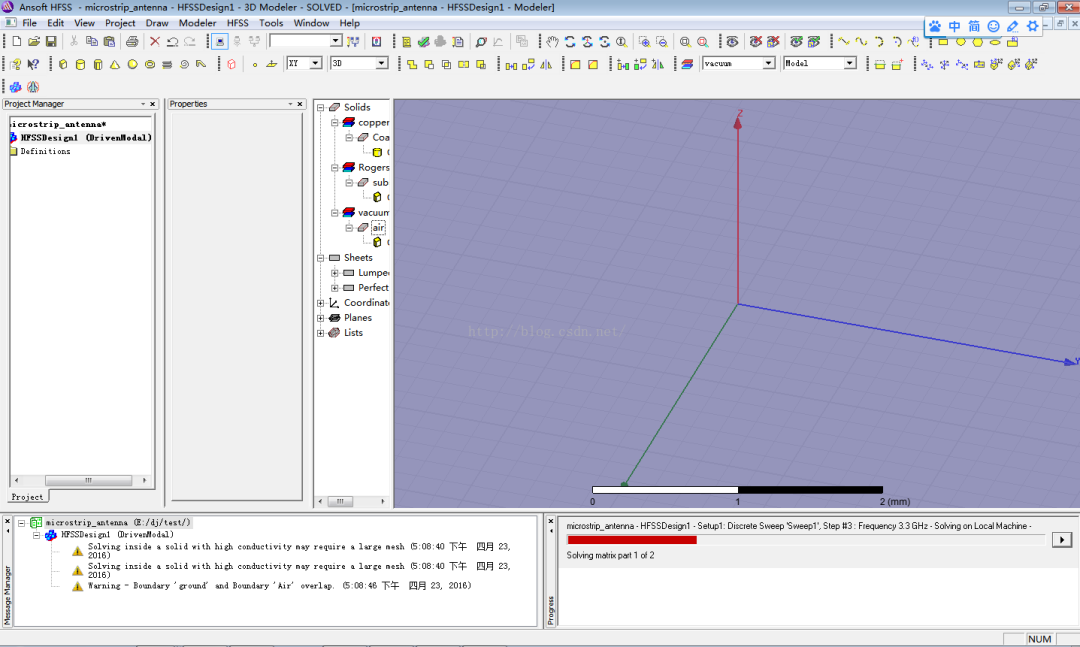
对于每个setup进行求解。是不是和手动操作是一样的?
hfss.solve(oDesign,setuplist)
8、退出HFSS
hfss.quit_application(oDesktop)
结束语:
今天暂时研究到这儿,还有很多比如查看求解完成后的驻波、增益曲线等等还有设置主从边界啦很多的api还没有编写,有时间会继续完善。
做了个有趣的小玩意儿,分享给大家~
完整主函数源码(api部分还不是很完整,哦,相当不完整,就先不给出了):
# -*- coding: utf-8 -*-
"""
Created on Fri Apr 22 14:29:38 2016
@author: DJ
"""
from __future__ import division
import hycohanz as hfss
raw_input('Press "Enter" to connect to HFSS.>')
[oAnsoftApp, oDesktop] = hfss.setup_interface()
raw_input('Press "Enter" to create a new project.>')
oProject = hfss.new_project(oDesktop)
raw_input('Press "Enter" to save the project.>')
hfss.save_as_project(oDesktop,"E:/dj/test/microstrip_antenna.hfss")
raw_input('Press "Enter" to insert a new DrivenModal design named HFSSDesign1.>')
oDesign = hfss.insert_design(oProject, "HFSSDesign1", "DrivenModal")
raw_input('Press "Enter" to set the active editor to "3D Modeler" (The default and only known correct value).>')
oEditor = hfss.set_active_editor(oDesign)
raw_input('Press "Enter" to draw a ground plane>')
ground = hfss.create_rectangle(
oEditor,
"-45mm",
"-45mm",
0,
"90mm",
"90mm",
Name='ground',
Transparency=0.8)
raw_input('Press "Enter" to assign a PerfectE boundary condition on the ground.>')
ground_faceid=[]
ground_faceidnum = hfss.get_face_by_position(oEditor, ground, 0, 0, 0)
print ground_faceidnum
ground_faceid.append(ground_faceidnum)
hfss.assign_perfect_e(oDesign, "ground", ground_faceid)
raw_input('Press "Enter" to insert some substrate properties into the design.>')
hfss.add_property(oDesign, "w", hfss.Expression("80mm"))
hfss.add_property(oDesign, "h", hfss.Expression("5mm"))
raw_input('Press "Enter" to draw a substrate using the properties.>')
substrate = hfss.create_box(
oEditor,
-hfss.Expression("w")/2,
-hfss.Expression("w")/2,
0,
hfss.Expression("w"),
hfss.Expression("w"),
hfss.Expression("h"),
Name='substrate',
Transparency=0.8)
raw_input('''Press "Enter" to change the substrate's material to Rogers 4003>''')
hfss.assign_material(oEditor, [substrate], MaterialName="Rogers RO4003 (tm)")
raw_input('Press "Enter" to insert some patch properties into the design.>')
hfss.add_property(oDesign, "w_p", hfss.Expression("31.0mm"))
hfss.add_property(oDesign, "l_p", hfss.Expression("41.4mm"))
raw_input('Press "Enter" to draw a patch>')
patch = hfss.create_rectangle(
oEditor,
-hfss.Expression("w_p")/2,
-hfss.Expression("l_p")/2,
hfss.Expression("h"),
hfss.Expression("w_p"),
hfss.Expression("l_p"),
Name='patch',
Transparency=0.8)
raw_input('Press "Enter" to assign a PerfectE boundary condition on the patch.>')
patch_faceid=[]
print hfss.Expression("h")
patch_faceidnum = hfss.get_face_by_position(oEditor, patch, 0, 0, 0.005) #hardcode!!
#print ground_faceidnum
patch_faceid.append(patch_faceidnum)
hfss.assign_perfect_e(oDesign, "patch", patch_faceid)
raw_input('Press "Enter" to draw a Coaxial core>')
Coaxial_core = hfss.create_cylinder(
oEditor,
"9.5mm",
0,
0,
"0.5mm",
"5mm",
Name='Coaxial_core',
Transparency=0.8)
raw_input('''Press "Enter" to change the Coaxial_core's material to copper>''')
hfss.assign_material(oEditor, [Coaxial_core], MaterialName="copper")
raw_input('Press "Enter" to draw a Signal transmission port>')
port = hfss.create_circle(
oEditor,
"9.5mm",
0,
0,
"1.5mm",
Name='port',
Transparency=0.8)
raw_input('Press "Enter" to subtract the transmission port from the ground.>')
hfss.subtract(oEditor, [ground], [port], KeepOriginals=True)
raw_input('Press "Enter" to draw an air box>')
air = hfss.create_box(
oEditor,
'-80mm',
'-80mm',
0,
'160mm',
'160mm',
'75mm',
Name='air',
Transparency=0.8)
raw_input('Press "Enter" to assign a Radiation boundary condition for the air box.>')
air_objectid=[]
air_objectidnum = hfss.get_object_id_by_name(oEditor, "air")
#print ground_faceidnum
air_objectid.append(air_objectidnum)
print air_objectid
hfss.assign_radiation(oDesign, objectname=['air'], Name='Air')
raw_input('Press "Enter" to assign a lumped port on the port.>')
port_faceid=[]
port_faceidnum = hfss.get_face_by_position(oEditor, port, "9.5mm", 0, 0) #hardcode!!
#print port_faceidnum
port_faceid.append(port_faceidnum)
hfss.assign_lumpedport_multimode(oDesign, "port", port_faceid,["10mm","0mm","0mm"],["11mm","0mm","0mm"])
raw_input('Press "Enter" to insert analysis setup.>')
setuplist=[]
setupname = hfss.insert_analysis_setup(oDesign, 2.45)
setuplist.append(setupname)
raw_input('Press "Enter" to insert frequency sweep.>')
hfss.insert_frequency_sweep(oDesign,
setupname,
"Sweep1",
1.5,
3.5,
0.1,
IsEnabled=True,
SetupType="LinearStep",
Type="Discrete",
SaveFields=True,
ExtrapToDC=False)
raw_input('Press "Enter" to solve the setup.>')
hfss.solve(oDesign,setuplist)
raw_input('Press "Enter" to quit HFSS.>')
hfss.quit_application(oDesktop)
del oEditor
del oDesign
del oProject
del oDesktop
del oAnsoftApp